
Showing posts with label HH Recipes. Show all posts

Sunday, 15 February 2009

Dinner with the Girls... (and 6 children)

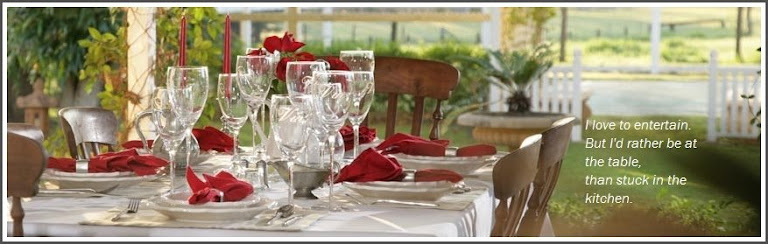
Last night it was Valentine's Day. And I could have had a romantic dinner with candlelight, roses and sweet-nothings. But I would much rather share a Saturday night with my 2 gorgeous girl-friends and their various off-spring.

The fact that that there were no offers of romance is incidental. Even if there had been, I would still have chosen dinner with my fabulous friends and 6 children. No, really. I would.

I don't get to sit down with my girlfriends nearly enough, so it is vitally important that we have quality chat time.

No exaggeration! The importance of conversation (catch-up, information sharing, the revealing of secrets, general chit-chat and giving of advice) cannot be underestimated.

So, it is always my goal to get out of the kitchen when the crowd descends, and get myself thoroughly involved with what is being shared.

Determined to have that 'quality friend time' (ie. "quality time spent with friends", as well as "time spent with quality friends"). I put together a menu of old favourites - all made well in advance.

Lamb stew - prepped in the morning, and left simmering in the slow cooker for 6 hours. Have to love the slow cooker.

Roast vegetable and rocket salad - prepped in the morning, and tossed together with the dressing at the last minuteCriss-cross potatoes - a baked potato variation, that is prepped an hour or so before the guests arrive.

Home-made pizzas for the children - easy-peasy, made ahead, into the oven just before arrival time.

And home-made, smooth-as-velvet, totally-wicked, chocolate ice-cream. More about this tomorrow. (note to self: do NOT finish all the ice-cream, must leave some to photograph. Must leave in freezer. Do not be tempted!

To make it even easier for everyone (that is, easier for me), I set everything up as a buffet, and let the beasts loose.

The roast vege and rocket salad is always a hit. It has substance, tastes great, looks impressive, and is 99% made ahead.


300-350g peeled butternut pumpkin
300-350g peeled sweet potato
250g zucchini
2 red onions peeled and cut into wedges
1 Tbsp olive oil
Ground black pepper
Sea Salt
1/4 cup pine nuts
50g rocket leaves
1/3 cup balsamic dressing of some sort


Chop the pumpkin, potato, onion and zucchini into large bite size pieces. Too small, and they tend to burn.


Lay all the chunks in a baking tray. Smother with olive oil. Add a generous amount of black pepper and salt, and toss about with your hands, to ensure every piece is well coated.


Ooppps, forgot the zucchini. Let's try that again....


Right, that looks better.

Roast in a 180-200 degree oven for about 30-35 mins.

I know I sound a bit vague on this, but I've come to learn that every oven is different. Mine seems to be hot... if a recipe says 200 degrees, then I opt for 180. You know your oven, and what works best for you.

And if you aren't on intimate terms with your major kitchen appliances yet, then just keep an eye on the proceedings. Don't presume that the temperature and time in a recipe will be perfect for you. I've learnt this the hard way.

When you remove the veges from the oven, turn it off, and pop in the pine-nuts on a baking tray. The heat from the oven will toast them nicely. Do not forget they are there. Do not leave them for longer than about 3-4mins. I did. And I had to re-do the nuts.

In fact I had to replace the pine nuts with slivered almonds, because I mutilated the pine nuts, and I didn't have any more. The slivered almonds still went well with the salad... so it wasn't a major calamity. I mean I've had worse disasters in the kitchen. This was nothing!

Put aside the nuts. Put aside the veges in a large serving bowl. Leave them on the bench, or chill in the fridge.

A little bit before you are ready to serve, add the rocket leaves and nuts to the roast vegetables. Add the dressing. Toss about a little. Done.


This salad is best at room temperature, so you can leave covered on the bench until it's time to eat.

This salad is also good the next day. I love left-overs! The rocket will wilt a bit, but it still tastes pretty darn good.

Thursday, 5 February 2009

After the Yolk

Last year - way, way, back in January of 2008, I resolved not to make any resolutions (utter waste of time). Instead, I was to adopt a 'rule' for the year. A mantra, of sorts, that would shape new habits (thus making me a much better person!). I banned any grand statements that started with "I shalt...", and aimed for a subtle change that would be long-lasting (the irony of my mantra being a resolution by another name, was not lost on me!).

So, scrawled on the kitchen blackboard - prominently displayed for me to see every day - were the words:

Spend less
Waste less
Do more

My blackboard scrawl is in-decipherable to most, but I knew what was there.

And it worked.

I saw those words everyday, and over time it became it did become a habit to check prices, question the necessity of more 'things', think before ditching stuff, and get off my butt.

Of course, the encouragement to "spend less" came from tallying up the credit cards ("how much ?????.... how did that happen???!!!!"). But the "waste less" felt pretty damn good, and "do more" made me feel virtuous.

Now, to get to the point... after spending the last few days making ice cream and other yolk-requiring desserts, I had a fridge full of egg-whites. What's a girl to do? "Waste less" remember, so it was off to make a 'pav' of course.

(I considered trying my hand at Angel cake, but the recipe called for 20 whites... 20! Sheesh!).

I've never succeeded at pavlovas. Or meringues. And my first attempt today was hideous. Brown instead of white, all crunch no marshmallow, and sort of dissolved into a sticky mess in the mouth. (No, I'm not going to show a picture, it's just too embarrassing).

Right. Obviously the oven was way, way to hot.

So, I found another recipe. This time for mini pavlovas, cooked in small springform tins, and tried again.

Mini springform tins are fabulous for creating small desserts. There is something impressive about serving up individual cheesecake or pavlova, dressed to kill with fruit, cream or such-like. It looks like you have gone to so much effort, and yet it requires no more of you, than a single large one.

For this recipe you will need 6 of them, lined on the bottom with circles of baking paper.


For these pavlovas I did use the mixer. Lovely, luscious, thick, satiny beaten egg-whites. The only way you will get me to eat raw egg whites!!

This is 6 egg-whites, beaten until the 'stiff peak' stage, then 1 1/4 cup of caster sugar, 1 tbsp cornflour, and 1 tbsp white vinegar, gradually added. Beat until the sugar is dissolved, then stop.


The mixture is spooned into the tins, leaving a little space at the top.


The recipe required the pavs to go into a 200 degree oven for 5 minutes, then reducing the temp. to 100 degrees, and baking for another 45 minutes.

As you can see my tops went a bit brown doing this (and I only had the oven at 180). Then I had to open the door of the oven to help it cool down quickly.

It seems to me the trickiest part with cooking pavlovas and meringues, is figuring out - by trial and error unfortunately - the best cooking conditions for your oven.

Next time I will set the oven at 120 degrees and cook at that temp for about 45mins.


On a positive note... my little pavlovas did have good squishy marshmallow, and topped with whipped cream, fresh blueberries and passionfruit, they were very yum. Not too big - as you can see they were only about 3cm high - and that delicious contrast of crunchy top and marshmallow body.

I will cook these again... and even feel confident to add them to a dinner party menu. They are definitely HH, since they can be made a day ahead and kept in an air-tight container... without the cream, obviously.

Tuesday, 3 February 2009

Frozen Foray #2... Vanilla Bean Ice Cream

Ice Cream.

Cream. Milk. Egg yolks. Sugar. Flavour. So simple.

So simple... especially if you have an ice cream maker. Because, ice cream needs to be churned. It must be moved about during the freezing process to prevent ice crystals forming. Ice crystals maketh the ice cream crunchy - which is not ideal.

Ice cream should be smooth, creamy and not too hard. (It should also be spoon fed to me by a divine male, while I recline, resplendent on a chaise before a perfect sunset, while the waves whisper on the edge of my tropical island.... ).

Commercial ice cream has extra stuff added to keep everything soft and smooth. Stuff that we don't have access to... so churn we must. And then we need to eat our ice cream immediately or move it from freezer to fridge about 30-40 mins before serving to allow it to soften up.

Home-made ice cream straight from the freezer is rock hard. Which can be a good thing. Especially if you are tempted to dive into the freezer, spoon in hand, for a quick nibble on a hot afternoon. Be warned, your grazing will be thwarted, and frustration may ensue.

If you don't have an ice cream maker, then you will need to give the ice cream a quick beating as it starts to freeze, then toss it back into the freezer. Ideally you will have the patience to do this 2 or 3 times. Which means that one should not whip up a batch of ice cream last thing at night - I will get out of bed in the middle of the night for crying children, whimpering dogs, smoke alarms, and burglars. But I will not get up just to beat the ice cream.

Having said all that, home-made ice cream is soooo worthwhile. Try this vanilla bean version - it makes ordinary ol' store-bought-vanilla seem boring. Impress your dinner guests with a simple, yet sophisticated dessert. Serve with fresh summer fruits, a berry coulis, or a decadent chocolate sauce.


1 vanilla bean
1 cup milk
300ml thickened cream
4 egg yolks
1/3 cup caster sugar


Making ice cream this way is a bit like making a custard from scratch. And it's not nearly as tricky as it might seem.

The steps are:

1. make the custard (quick and easy, takes only about 10 mins)
2. chill
3. freeze
4. beat the half-frozen ice cream, and re-freeze
5. repeat step 4

So to begin... cut open the vanilla bean lenthways, scrape out the seeds, and toss the pod and seeds into a saucepan with the milk and cream.

Bring to the boil... this won't take long, so keep and eye on it. Turn the heat down low.

While waiting for the milk, beat (or whisk if you feel like giving your arms a work-out) the yolks and sugar until creamy.

After the milk has boiled slowly pour the egg mixture into the saucepan while giving it all a good whisk.

Stir over a low heat. The mixture will thicken slightly.

Remove the pods - or even better strain through a sieve - as you pour into a bowl. Cover the surface with cling wrap (which prevents a skin forming on the surface), an chill in the fridge for about an hour or so.


At this point, those with a passion for small appliances can pour the custard-like mix into the bowl of the ice-cream maker, and set to churn as per the instructions and recommendations. (You do still have the instruction book, right?!). The aim is to churn the mixure, while it freezes, and when it is about the consistency of soft-serve ice cream, transfer to a container and pop it into the freezer.

For those who like to do things the old-fashioned way, pour the chilled custard mix into a shallow metal container (think loaf tin or similar) and leave in the freezer until it is getting hard around the edges (about 1 -2 hours). Then transfer from the tin into a mixing bowl, give the ice cream a bit of a beating with a hand-held beater, transfer back into the tin, smooth down, replace foil, and return to freezer.


And you will repeat this step 2 or 3 more times.

The biggest problem with this process? The quantity of ice cream seems to shrink with every beating. Hmmm... perhaps it has something to do with my need to taste as I create. And lick the beaters. Have another taste just to make sure all is going well. Then return to freezer.


Thursday, 29 January 2009

Frozen Foray #1... Semifreddo


Yippee for summer... the days are hot, the nights are warm, and dessert should come straight from the freezer.

If it's just me, on my lonesome, needing a sweet fix after dinner, then a mini Magnum will do the trick. Or not.

Ok, sometimes one little chocolate-covered-ice-cream-on-a-stick, is NOT enough... and I might splurge on two (but they're only mini size, right, so it's not really bad. Well, not really, really bad.)

Anyway, sometimes when there is grown-up company sharing the table - and it's not just me sprawled in front of the TV - I want the same impact (cold, sweet, gooey) with a little more style.

Semifreddo. Gelato. Ice Cream. Granita. Sorbet. Take your pick!

And the best thing - besides the satisfaction of mouthfuls of creamy sweetness - is that desserts like these are soooo ideal for an Horizontal Hostess.

1. Make a day or more ahead.
2. Remove from freezer.
3. Serve.
4. Maybe dress up a little with a sauce or fruit or some-such.... which can also be made well ahead.

So, over the next week, I am trialling, testing, and tasting. Bringing you the full round-up of all things frozen. (Poor me)

Up first.... Nougat Semifreddo. Smooth, rich, sweet, and full of crunchy-chewy pieces of nougat (yes, it is possible to be crunchy and chewy). Serve with a raspberry coulis or some other berry add-on... the slight tartness of the berries ease the semifreddo away from being overly rich. In this recipe the semifreddo is set in a tin, cut into pieces and served on a plate. It's not really going to work in a cone.

And the first question of the day: What is a Semifreddo? And is that Fred-o, as in Freddo Frog? And why not just call it ice-cream?!

Semifreddo is Italian for half-frozen. It's said Semi-Fre-Dough (not a Fred-O anywhere).
And it's not called ice-ceam, because... well, because, it's not an ice-cream. Not really. Not if you are being technical about these things. It does have a lot in common with ice-cream (cream, egg yolks, sugar, freezer), but it's not churned in the way that ice-cream ought to be. And it typically has something "airy" included - think whipped cream or beaten egg whites. The incorporated air is meant to make it easy to scoop/eat when it's frozen.

This week's first Semifreddo... a nougat variety (recipe found in Delicious magazine)

Start with this huge assortment of ingredients:


3 eggs, seperated
3 tbsp honey
300g mascarpone
120g nougat


Chop up the nougat into small chunky pieces.... smaller than these pieces. Smaller than a mouthful.
I just wanted to show you the gorgeous chewy bits in this nougat.
I'm not really a big fan of nougat - in fact I'd never buy it. It took me ages to find it in the supermarket - but this just looked so good!


Then you are going to beat the eggs and honey together until pale.

The recipe said to use an electric mixer. I have a lovely mixer. A glorious Kenwood. Brand new (well, 40th birthday present... and that wasn't so long ago. Really!).

I also have "Tiffany". My trusty little hand-held beater. Picked up in a supermarket about, ummmm, 5 years ago, when I was waddling through my first pregnancy, the nesting instinct was taking over, and I had decided to start baking.

For some reason I still use little ol' Tiff. I blame it on my dislike of hand washing big things. It doesn't make sense really, since I still have to use a bowl when I use the hand-held (obviously). And when you use a mixer you can walk away and do other things... instead of being glued there, holding the damn thing. But logic plays no part in this.

Anyway, your choice... I wielded my hand-held.

Once honey and yolks are pale (really pale, but don't expect white), add the mascarpone and beat some more. Fold in the nougat.

In another bowl beat the egg whites until stiff.

Now, see, if you were using the mixer, you would have to remove the yolk/honey mixture to another bowl. Wash the mixer bowl, and then beat the whites. Or, you would have to get out the hand-held beater as well as the mixer to do the whites. Hmmm... of course you could be beating the egg whites with your hand-held while the mixer is working on the yolks and honey. But, hell, that would be noisy !!!

Whichever way you go, you will now fold the egg whites into the yolk/honey/mascarpone/nougat mixture.

Line a smallish tin with plastic wrap, and pour in the goo.


Freeze. Until firm.

In a truly scientific fashion, I tested the semifreddo at various time points... and after about 3 hours it was perfect. Frozen, but still scoop-able.

Then I restrained myself, and left it there overnight. Just to see if it's still good if you make it miles and miles ahead of serving.

The good news... get organised and make this dessert days ahead of guests arriving!

However... tis a good idea to move from freezer to fridge at least 30 minutes (I left it in the fridge for a good hour) before serving or it will be way too hard. After a spell in the fridge, it will return to being smooth and soft-ish - and the nougat won't break your teeth.